Fig and Cardamom Friands

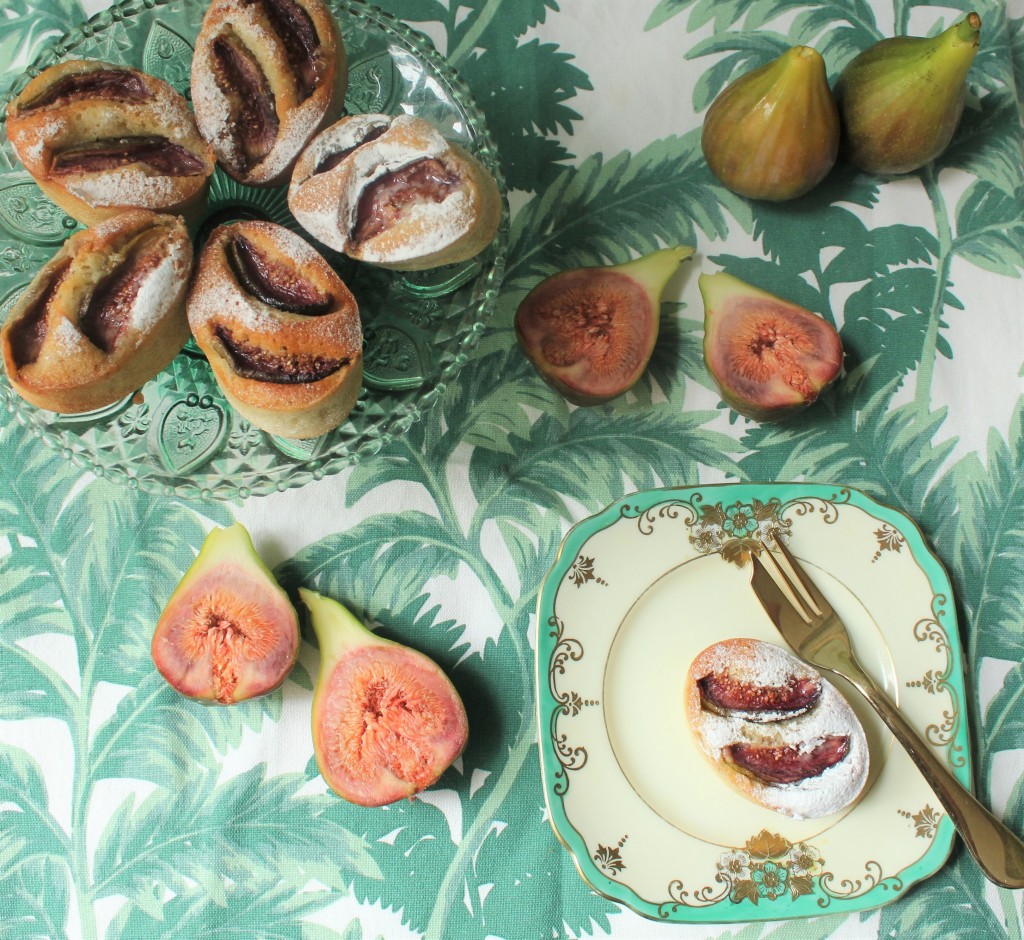
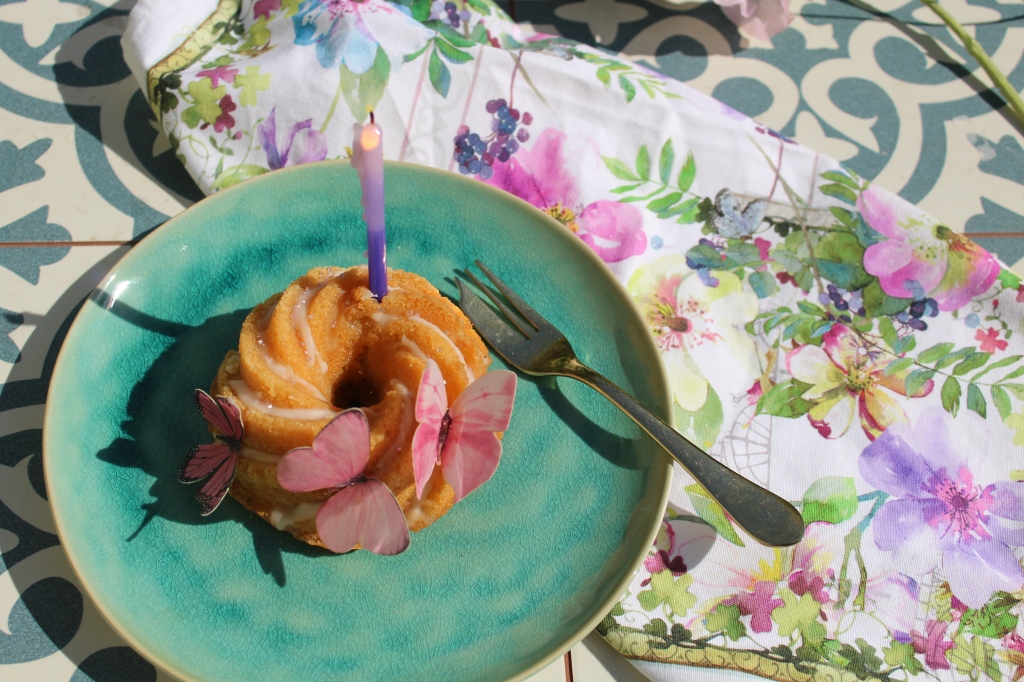
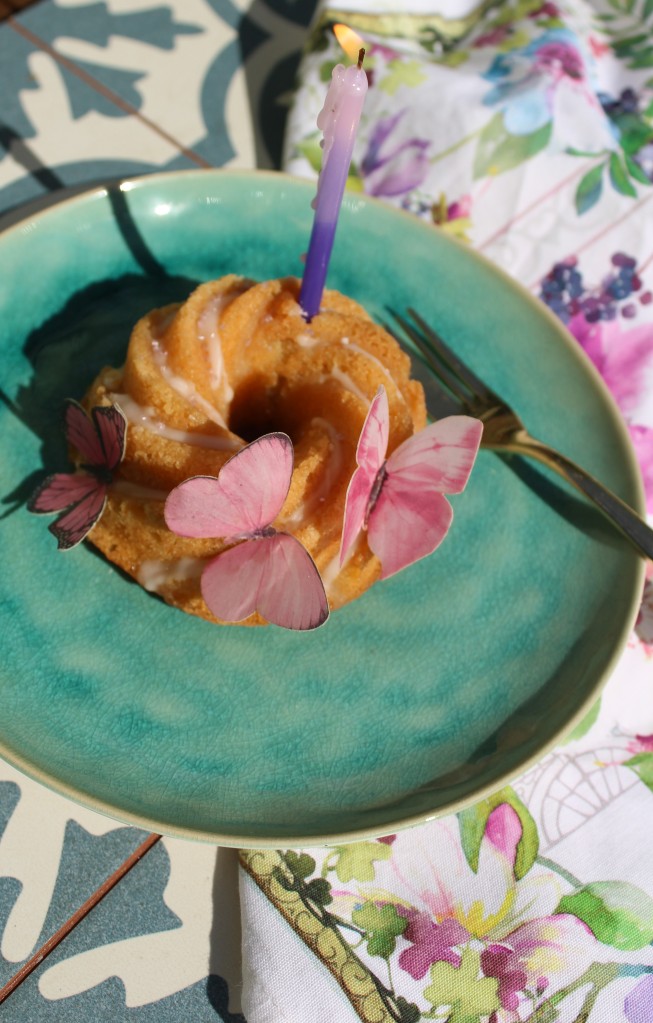
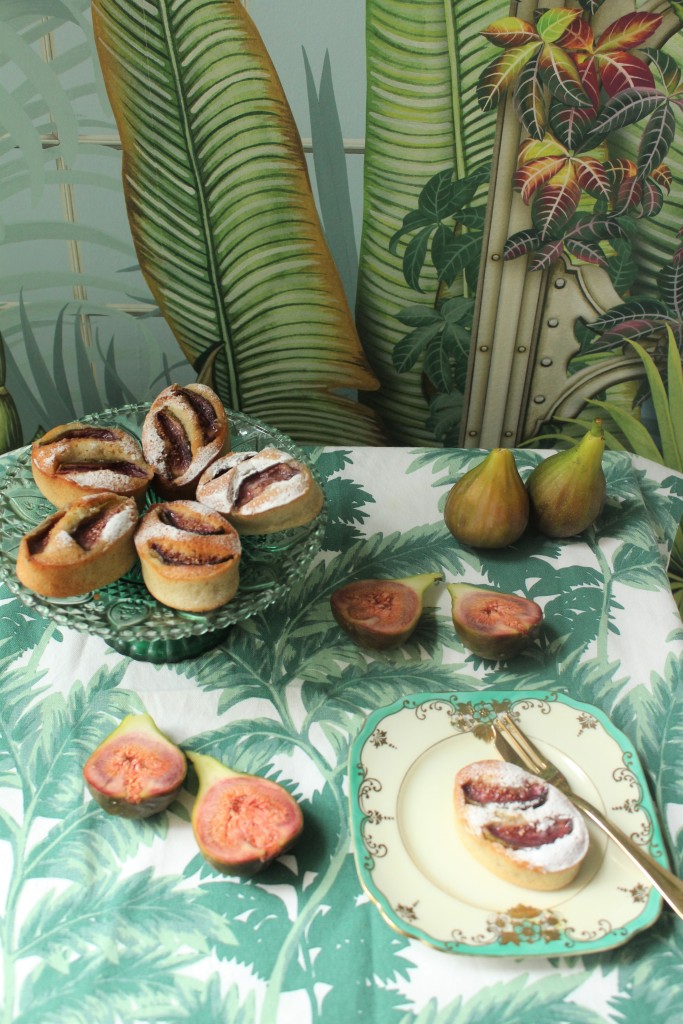
One of the best things about friands, is that once you have the basic recipe, you can adapt it to suit any season, any type of fruit and any type of spice. In this version I combined two of my favourites, figs and cardamom. I still maintain that this is the perfect size cake because it is big enough to hit the spot but small enough to make you feel that you haven’t overindulged, unless of course, you have more than one which is easily done as they are so delicious.

Makes 12

125g unsalted butter, plus extra for greasing

50g plain flour

115g icing sugar

75g ground almonds

4 medium egg whites

1/2 teaspoon almond extract

1 teaspoon ground cardamom

4 figs (Cut in half and then each half into thirds)

Directions

  • Preheat oven to 200°C/180°C fan/ gas Mark 6.
  • Grease a 12-hole muffin tin with a little butter, then line the bases with circles of baking parchment.
  • Melt the butter.
  • Sift the flour and icing sugar into a bowl and add the ground almonds and cardamom. Whisk the egg whites until soft peaks form. Stir the almond extract and melted butter into the flour mixture and mix to combine.
  • Using a large metal spoon, fold a quarter of the egg whites into the flour and butter mixture to lighten it, then fold in the remainder until it is just combined.
  • Divide the mixture into the holes in the tins. Arrange the figs on the top and bake for 15-18 minutes. Leave in the tin for 5 minutes, then loosen the edges with a knife and transfer to a wire rack to cool.
  • Serve lightly dusted with icing sugar.

Fig and blue cheese quiche

I’m a huge fan of a quiche and have made many of them! There are a lot of blue cheese and fig quiche recipes around, and that’s not surprising. There is something quite tantalising about the combination of sweet juicy figs and the sharp saltiness of the blue cheese. I tend to opt for a creamy blue cheese like Saint Agur Blue or Castello Creamy Blue, but quite often I just use whatever my local Co-op has in stock. In terms of the creamy part of the quiche, I like to use a full fat Greek yoghurt rather than cream or crème fraiche as I have convinced myself it’s healthy. For my pastry, I always use Eric Lanlard’s recipe and may add a herb like thyme or rosemary, finely chopped, or perhaps walnuts.  I don’t really follow one particular recipe; I use my favourite elements from lots of different ones. This recipe is not original, but it has evolved to suit my particular tastes, I think it’s delicious and hope you do too.

Ingredients

For the pastry

400g all-butter shortcrust pastry. (I used Eric Lanlard’s recipe)

250g plain flour

1 tsp fine salt

150g unsalted butter

1 egg beaten

1 tbsp milk

For the filling

Knob of butter

  400g shallots, sliced

1 tbsp fresh thyme leaves, plus extra to decorate

4 eggs

400ml full fat Greek style yoghurt

140g blue cheese

8 figs, halved, cut sides brushed with a little olive oil

To make the pastry

  • Sift flour and salt into a large bowl.
  • Rub in the butter with your fingertips until it resembles fine breadcrumbs.
  • Make a well in the centre and add the egg and milk.
  • Use fingertips to mix and ingredients to make a dough.
  • Turn pastry out onto a floured surface and knead two to three times.
  • Wrap in cling film and put in the fridge to rest for 30 minutes.

Blind Baking

  • Preheat oven to 180°c (fan 160°c)/ gas 4.
  • Roll pastry out and transfer onto a buttered 23cm loose-bottomed tart tin.
  • Prick the pastry and chill for a further 15 minutes.
  • Place a large piece of grease proof paper over the case and fill it with baking beads (or in my case, dried split peas).
  • Cook for 10-15 minutes.
  • Remove the paper and beans and cook for a further 10 minutes until the pastry is dry and crisp and the top edges of the tart are golden.

To make the filling

  • Melt the butter in a large pan, then add the shallots and soften for 10-15 mins, until golden and squishy. Stir in the thyme for 1 min, then remove from the heat.
  • Beat the eggs in a jug with the yoghurt. Crumble in the cheese and season with pepper and a small amount of salt.
  • Add the cooled onions to the cream mixture and pour into the case.
  • Sit the fig halves on top, cut side up, sprinkle with some more thyme and bake on the middle shelf for 1 hr-1hr 10 mins until the tart is browning and has a slight wobble – the cheese middle will firm up on sitting.
  • Cool for about 15-20 mins, then remove from tin and serve with a green salad.

Figs dipped in dark chocolate with sea salt

It’s fig season! The tree in my garden has produced a bumper crop of figs so succulent and sweet that honey would be overkill. This has coincided with a heatwave, so I’m eating lots of fig salads, figs with yoghurt and orange zest rather than some of the bakes that I usually do. A friend of mine suggested that I just dip the figs in chocolate. Then we decided what would be even better would be if the chocolate was dark, bitter and with sea salt. So now we have the perfect sweet treat, something that is salty, bitter and very sweet and only takes a few minutes to make.

I can’t really call this a recipe because all you have to do is: cut the figs in quarters, melt the chocolate, (I used Lindt dark chocolate with sea salt), cover the figs with the melted chocolate and put them in the fridge to set.

The Perfect Summer Lunch: Sicilian style pasta and rocket salad with caramelised oranges, figs and manchego

It was not my intention to post this. I took the pictures to capture the moment of a beautiful summer’s day, sitting under the dappled shade of my fig tree in my own private bubble with my partner. The food was amazingly delicious and so easy to make that it would be a crime not to share it. The pasta was unexpected; the orange and cinnamon are not something I would usually use in a pasta dish, until now. The recipe is from goodhousekeeping: https://www.goodhousekeeping.com/uk/food/recipes/a558776/sicilian-all-in-one-pasta/

The salad recipe is from Melissa Hemsley. The orange was a nice tie in to the pasta, though the figs did not come from the tree we were sitting under! https://www.sainsburysmagazine.co.uk/recipes/salads/wild-rocket-salad-with-caramelised-oranges-figs-and-manchego

Sicilian Style Pasta

Ingredients

300g wholewheat spaghetti

400g cherry tomatoes (plus extra to garnish)

finely grated zest and juiceof 1 orange

50ml  olive oil

50g sultanas

5cm piece cinnamon stick

2 oregano sprigs, leaves picked, plus extra to garnish

160 g tin tuna in spring water, drained

large handful rocket    

Directions

  1. Put pasta into a large, deep frying pan so it lies flat, breaking it up, if necessary. Add tomatoes, orange zest and juice, oil, sultanas, cinnamon, oregano and some seasoning.
  2. Pour in 750ml (1¼ pint) freshly boiled water from the kettle. Bring up to the boil over high heat, then bubble for about 15min, mixing occasionally, or until the pasta is just tender and there is a nice volume of sauce left.
  3. Mix through tuna and check seasoning. Discard cinnamon. Divide among four bowls and sprinkle with some oregano leaves, rocket and tomatoes.    

Rocket salad with caramelised oranges, figs and manchego

Ingredients

3 oranges

4 tbsp extra-virgin olive oil, plus extra for the tray

50g blanched almonds (or with skins on)

3 ripe figs

50g Manchego or vegetarian alternative, rind removed

1 tbsp clear honey

1 x 120g bag wild rocket

2 medium courgettes, shaved into ribbons, or 1 fennel bulb, thinly sliced

Directions

  1. Preheat the grill to high. Peel two of the oranges, slice into 5mm rounds and place on an oiled baking tray. Grill the oranges for 5-7 minutes until they start to brown and are a little soft, but not falling apart. Meanwhile, toast the almonds in a dry frying pan until golden, then roughly chop them.
  2. Halve the figs or quarter if large. Use a vegetable peeler to make shavings of Manchego.
  3. Squeeze the juice from the remaining orange and whisk with the honey, oil and some seasoning. Spread the rocket over a large serving platter. Top with the figs, caramelised oranges and the courgette ribbons or fennel. Scatter with Manchego shavings, drizzle with the dressing and season with salt and pepper. To serve, scatter with thetoasted chopped almonds.

Raspberry Amaretti

Spurred on from the success of the Matcha Amaretti, (Click here for Matcha Amaretti post) I decided to find that raspberry powder I bought on impulse and then neglected in the back of the cupboard and inject some life into it. The results could not have been better.  I know raspberry is not a traditional flavour, but the raspberry really popped whilst the texture remains true to a traditional amaretti. As mentioned previously, cook 25 minutes for a slightly harder outside and soft chewy middle or 20 minutes for a soft amaretti.

The recipe comes from: https://www.loveandoliveoil.com/2018/12/raspberry-amaretti-cookies.html

Ingredients

200g almond flour or very finely ground almonds, sifted

200g granulated sugar (I used 150g)

25g freeze dried raspberry powder

Few drops of red food colouring

pinch salt

2 large egg whites (about 60g)

1/4 teaspoon lemon juice

1/2 teaspoon almond extract

icing sugar to dust

Directions

  1. Preheat oven to 150 degrees C. Line a baking tray with baking paper or a silicone baking mat.
  2. In a large bowl, whisk together almond flour, sugar, raspberry powder and salt until evenly incorporated.
  3. In a mixing bowl or the bowl of a stand mixer fitted with the whisk attachment, whisk egg whites, food colouring and lemon juice until they hold soft peaks.
  4. Add beaten egg whites and almond extract to dry ingredients and stir until mixture forms a soft, sticky dough.
  5. Lightly dust your hands with icing sugar. Portion the dough into 1-inch balls. Roll into a smooth ball, then roll in icing sugar. Arrange on the lined baking tray, leaving 1 inch of space between balls.
  6. Bake for 25 minutes until tops are cracked and bottoms are just barely golden. If you prefer softer amaretti bake for 18-20 minutes. Remove from oven; let cool a few minutes, then transfer to wire racks to cool completely.

Rose and Semolina Birthday Cake

This cake is a true family birthday cake. I made it for my mum’s birthday at the end of January, but because I was ill, I ended up cancelling my trip and the cake ended up in the freezer. Then I was going to go to Newcastle to celebrate the March birthdays (Dad’s and Aunty Joan’s) as well as Mother’s Day but this was just before lockdown and we decided to cancel that as well, so the cake stayed in the freezer. Finally, it was my birthday and the cake came out! Actually, I made six of these mini bundts, so to be honest I did try one to make sure it was ok after being in the freezer for all that time! (It was fine).

I made the syrup with rose water rather than fresh rose petals and added the fennel and cardamom as suggested in the recipe. I had the butterflies, made from rice paper, in my cake decorating box so decided to use them.  The original recipe comes from:

https://www.twiggstudios.com/2019/06/moist-semolina-cake/

Sponge Ingredients

  • 125g baking spread or softened butter
  • 125g golden caster sugar
  • 90g ground almonds
  • 130g fine semolina flour
  • 3 eggs
  • 1 tsp baking powder
  • 2 tablespoon rose syrup or 1/2 tsp rose extract
  • 1/2 tsp vanilla bean extract
  • pinch of salt

Directions

  • Preheat the oven to 160c fan
  • In the bowl of a stand mixer with the whisk attachment, whip the butter or baking spread (margarine) with the sugar and beat for about 4 minutes, then scrape the sides of the bowl with a spatula. Then mix again for 1 or two minutes or until really pale and creamy.
  • Add one egg and mix at high speed for 2 minutes, then scrape around the sides of the bowl and mix again for another 2 minutes, then add the next egg and mix again for two minutes. scrape the bowl and add the last egg and mix for 2 minutes until thick and creamy.
  • Add the rose syrup, or extract and vanilla and mix.
  • Mix the semolina, almonds and baking powder together with a pinch of salt, then fold until combined then add the mix and mix in.
  • Pour into a lined 9 inch cake tin, (I used a mini bundt tin) and bake on the middle shelf of the oven for about 30 to 40 minutes or until a knife inserted into the centre comes out clean.
  • Leave to cool in the tin for 15 minutes, then remove and cool on a wire rack.
  • Once completely cooled, drizzle over some syrup to make it into a delicious moist semolina cake and serve with praline and cream or creme fraiche.

Wild rose syrup with cardamom and fennel seeds

Ingredients

  • 2 cups fresh wild rose petals (garden roses will also work) or use 1 tsp rose water
  • 5 cardamom pods
  • 650ml water
  • 1/2 tsp fennel seeds
  • 1 cup caster sugar

Directions

In a pan add the rose petals, water, cardamom and fennel seeds then simmer for 20 minutes on a medium heat. Strain liquid and remove the petals and seeds then pour back into the pan.

Then add the sugar, stir to combine and reduce until syrupy (about 5 to 8 minutes)

Matcha Amaretti

Although I cannot reveal how I obtained the ground almonds during lockdown, I was delighted that they came into my possession. It meant that I could do a trial run of the recipe I was going to use as my birthday recipe. Quite often, I make macarons to share with my nearest and dearest, but after the success of Ottolenghi’s amaretti I made at Christmas (click here for recipe)and my love of matcha (see matcha, pink peppercorn and cherry madeleines click here for recipe), I decided that these matcha amaretti would be the perfect little morsel to celebrate with.

I found the recipe on https://www.loveandoliveoil.com/2019/02/matcha-amaretti-cookies.html. There is also a raspberry version using raspberry powder which also look tempting. The only changes I would make to this recipe would be to reduce the amount of sugar from 200g to 150g and also to reduce the cooking time to allow for a softer amaretti. Though I have to say I did enjoy the chewy amaretti that came as a result of 25 minutes in the oven, I prefer a softer version. Next time I’ll bake them for 15-18 minutes as in the Ottolenghi recipe.

I will definitely be baking a double batch to celebrate my birthday when we get out of lockdown, one matcha and one raspberry. For now though, I will just have to enjoy these on my own!

Ingredients

200g almond flour or very finely ground almonds, sifted

200g granulated sugar (I used 150g)

1 tablespoon matcha powder

pinch salt

2 large egg whites (about 60g)

1/4 teaspoon lemon juice

1/2 teaspoon almond extract

Icing sugar to dust

Directions

  1. Preheat oven to 150 degrees C. Line a baking tray with baking paper or a silicone baking mat.
  2. In a large bowl, whisk together almond flour, sugar, matcha and salt until evenly incorporated.
  3. In a mixing bowl or the bowl of a stand mixer fitted with the whisk attachment, whisk egg whites and lemon juice until they hold soft peaks.
  4. Add beaten egg whites and almond extract to dry ingredients and stir until mixture forms a soft, sticky dough.
  5. Lightly dust your hands with icing sugar. Portion the dough into 1-inch balls. Roll into a smooth ball, then roll in icing sugar. Arrange on the lined baking tray, leaving 1 inch of space between balls.
  6. Bake for 25 minutes until tops are cracked and bottoms are just barely golden. If you prefer softer amaretti bake for 15-18 minutes. Remove from oven; let cool a few minutes, then transfer to wire racks to cool completely.

Hot Cross Buns

I wasn’t intending to make hot cross buns as I had managed to buy some on a trip to the supermarket during lockdown. I also snapped up the last bag of strong white bread flour. Yes! Then a fellow baker asked if I was going to make any hot cross buns for Easter but I told him I didn’t have the right dried fruit. I had apricots and a tiny handful of cranberries, not a sultana in sight. So, I toasted and buttered one of Sainsbury’s best buns. They were quite squidgy as supermarket buns tend to be, but they did the trick. During my trip to the supermarket I also bought a Lindor bunny (just because) and some tulips to lift my spirits; a proper collection of Easter goodies which would make a lovely picture. Then I started feeling weird, why would I take a picture of supermarket goods when usually I only take pictures of food that I have made? I already had the flour, so I decided to have another look in the cupboard and found a jar of stem ginger. That was it; I followed a Jamie Oliver video and made these really lovely hot cross buns. The top is glazed with the syrup from the stem ginger rather than the honey which was in the recipe.  So here I am in splendid isolation eating homemade hot cross buns! Hey don’t judge me, I might put some in the freezer!

Ingredients

200 ml semi-skimmed milk (I used almond milk)

55g unsalted butter

½ teaspoon nutmeg (freshly grated if possible)

455g strong white bread flour

1 teaspoon cinnamon

1 teaspoon salt

55g caster sugar

7g yeast (one sachet of dried yeast)

1 large egg

85g Sultanas

2 tablespoons candied peel (I used dried apricots in place of the sultanas and the peel)

30g stem ginger (I used 2 balls)

Honey to glaze (I used the stem ginger syrup)

Directions

  1. Put the milk and butter into a saucepan and gently heat until the butter has melted. Grate the nutmeg into the milk mixture and set aside to cool.
  2. In a bowl, put the flour, cinnamon, salt, sugar and yeast then mix until combined.
  3. Add the egg and start to combine with the flour using a fork. Add the milk mixture and start to bring the dough together.
  4. Dust a clean surface with flour and tip out the dough. Knead for 10 minutes. Place the dough into a bowl and cover with a clean tea towel. Leave to prove for 30 minutes.
  5. Knock the air out of the dough and flatten with your fingers. Scatter the fruit and ginger evenly over the dough and press it into the dough.
  6. Fold the dough over itself and start to bring it back together so that the fruit is incorporated. Shape into a log and them cut into 12 equal pieces. Shape the pieces into balls and place them onto a baking tin, cover with a tea towel and leave to prove again for 30 minutes. The balls should expand slightly and may touch the ball next to them.
  7. In the meantime, make the mixture for the cross by mixing 2 tablespoons of flour with a little water. You are aiming for a consistency that is runny enough to be piped. Put the mixture into a piping bag. When the buns have proved, pipe the cross on the buns.
  8. Bake at 190 degrees, for 15-20 minutes. Glaze the buns as soon as they come out of the oven with honey (or ginger syrup).

Squash and Chickpea with Herby Yogurt

I had no intention of blogging this recipe; in fact I only made it the first place as I was lacking inspiration and I know that C really likes chickpeas. I’ve seen a lot of recipes with variations of this chickpea stew which was probably why I wasn’t too excited by it. The recipe was in Sainsbury’s Magazine, (November 2019). I made a few tweaks to it as I was making it, notably adding the rind of half a preserved lemon to the stew and the other half to the herby yoghurt. I also steamed some kale and added a generous knob of butter through it. We both enjoyed the dish so much that I just had to share it. It’s quick and easy to make and packs a full flavour punch. 

Ingredients

  • 2 tsp olive oil
  • 1 onion, sliced
  • 1 x 400g pack peeled squash, cut into 1cm cubes
  • 1 x 400g tin chickpeas, rinsed and drained
  • ½-1 tbsp harissa paste
  • 1 vegetable stock cube, crumbled – use gluten-free stock if required
  • 2 tbsp chopped parsley
  • 2 tbsp chopped dill
  • 3 tbsp 0% fat Greek yogurt
  • a handful of pomegranate seeds, optional
  • 1 preserved lemon, rind only (half for the stew and half for the herby yoghurt)
  • 200g Kale
  • Knob of butter

Directions

  1. Heat the oil in a deep pan and fry the onion and squash for 5 minutes. Add the chickpeas, 400ml boiling water, harissa paste, the stock cube and half the preservedlemon rind, finely chopped. Simmer, covered, for 10 minutes, then uncover for another 5 minutes until the squash is soft when pierced with a knife and most of the liquid has evaporated to give a slightly soupy stew.
  2. Mix 1 tablespoon of each herb into the yogurt with the other half of the preserved lemon rind, finely chopped and season.
  3. Steam the kale for 5 minutes and then run the butter through the kale, season with salt. Stir the remaining herbs through the stew. Serve in deep bowls with the kale on the bottom, then the chickpea mixture dollop of the herb yogurt on top and a scattering of pomegranate seeds, if you wish.

Curried parsnip and pear soup

Surely there is no better month for soups than January. Cold afternoons and the aftermath of December’s over-indulgence mean that soups are both comforting and virtuous, depending on how much thickly buttered bread you eat with them. The key ingredients of this soup work well together; the earthiness of the parsnip and the sweetness of the pear are lifted by the heat of the curry powder.  The recipe is from https://www.goodtoknow.co.uk/recipes/curried-parsnip-and-pear-soup  

The recipe ticks all the boxes for me; it’s seasonal, spicy and just a little bit decadent with its showy but delicious garnish. It’s extremely easy to make and will brighten anyone’s January afternoon.

Ingredients

  • 50g butter
  • 1 onion, roughly chopped
  • 2 tsp curry powder (You can make this by using equal measures of crushed cumin coriander and mustard seeds, turmeric and chilli (flakes or powder)
  • 600g parsnips (about 6), roughly chopped
  • 3 pears, quartered
  • 500ml milk
  • 800ml vegetable stock
  • 3 tbsp double cream
  • To serve
  • Knob butter
  • 1 pear, sliced
  • Small handful of pumpkin seeds

Directions

  • Heat the butter in a large pan and add the onion and curry powder. Gently sauté for 5 minutes, or until the onion softens.
  • Put the parsnips and pears in the pan and stir so that they become well coated in the curry butter. Pour in the milk and stock, bring to the boil, then reduce the heat and simmer for 20-25 minutes.
  • Check that the parsnips are tender before removingfrom the heat. Blend using a food processor or hand blender, then stir through the cream and season to taste.
  • To serve: melt the butter in a frying pan and carefully add the pear slices. Allow the pear to fry for 1 minutes then use tongs to flip it and allow the other side to cook for a further minute.
  • Ladle the soup into bowls and garnish with pear slices and pumpkin seeds.